


搜索到
329
篇与
的结果
-
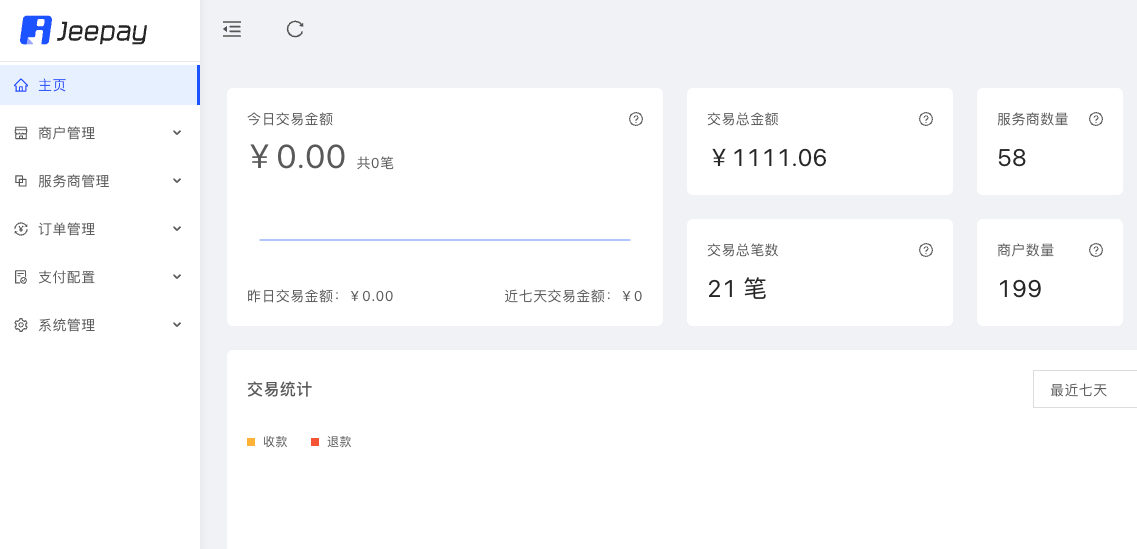
 支付系统Jeepay部署测试过程 {bilibili bvid="BV183HKejEDN" page="脚本运行视频"/}前言Jeepay是一套适合互联网企业使用的开源支付系统,支持多渠道服务商和普通商户模式。已对接微信支付,支付宝,云闪付官方接口,支持聚合码支付。{card-default label="运营后台" width="80%"}{/card-default}服务器准备一台配置为(4核+8G+2M+带宽)的VPS,本文只是测试所以采用 腾讯云 的竞价实例。预装ubuntu22.04的系统。{card-default label="竞价实例" width="80%"}{/card-default}一键安装脚本官方文档提供一键安装脚本,登录新建的服务器,直接执行。等待安装完成。apt update && apt-get -y install docker.io && apt-get -y install git && wget -O install.sh https://gitee.com/jeequan/jeepay/raw/master/docs/install/install.sh && sh install.sh官方文档地址登录验证登录运营平台,http://外网IP:19217。默认用户密码:jeepay/jeepay123。登录后即可添加支付接口。{card-default label="添加支付" width="85%"}{/card-default}项目地址【支付源码】支持聚合吗支付的支付系统Jeepay
 -
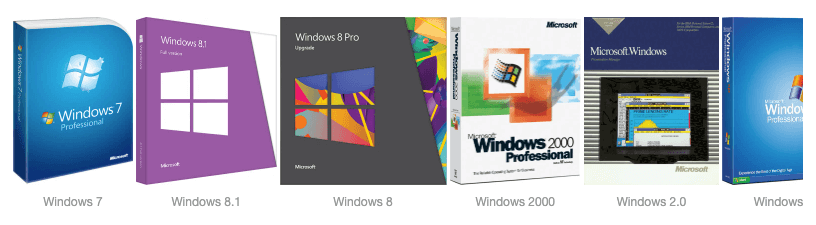
Windows系统镜像各种发行版格式说明 前言Windows发型版本中,有不同的格式。一般来说,官方发ISO包比较多,第三方修改包,一般发ESD包比较多。wim比较少,在ISO包里面,会包含win包。ISO格式全称International Organization for Standardization,它包含整个文件系统,并且可以直接被刻录到光盘或用作虚拟光盘挂载。{card-describe title="描述"}ISO 文件是一种光盘镜像文件,可以包含一个完整的文件系统的精确副本。通常用于分发操作系统、软件和其他数据光盘的镜像。{/card-describe}{card-describe title="用途"}ISO 文件通常被用来创建可启动的安装光盘或 U 盘,用于操作系统的安装或软件的分发。你可以将 ISO 文件刻录到光盘或通过虚拟光驱加载。{/card-describe}ESD格式全称Electronic Software Distribution,文件体积较小,通常包含 Windows 安装的压缩版本。解压或转换 ESD 文件需要专门的工具。{card-describe title="描述"}ESD 文件是一种高度压缩的镜像文件格式,主要用于分发 Windows 操作系统的安装文件。它比 ISO 更小,因为它采用了更强的压缩算法。{/card-describe}{card-describe title="用途"}ESD 文件通常用于在线分发 Windows 更新或安装包,通过 Windows 更新或 Media Creation Tool 获取。ESD 文件可以转换成 ISO 文件,以便制作安装介质。{/card-describe}WIM格式全称Windows Imaging Format,支持文件压缩和多文件映像,灵活性高,广泛用于 Windows 部署场景。{card-describe title="描述"}WIM 文件是微软开发的文件格式,用于存储 Windows 操作系统的映像。WIM 文件可以包含多个映像(例如不同的 Windows 版本或版本),并且支持文件的增量更新。{/card-describe}{card-describe title="用途"}WIM 文件常用于 Windows PE(预安装环境)和 Windows 安装程序中。它们允许创建可引导的安装映像,并且可以在安装过程中进行修改。{/card-describe}总结ISO:通用光盘镜像文件,适合制作安装光盘或 U 盘。ESD:更小的压缩安装镜像文件,主要用于在线分发 Windows。WIM:灵活的 Windows 映像文件格式,适合多版本的操作系统部署和维护。
-
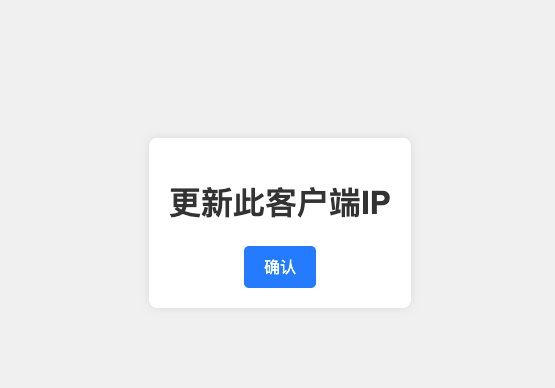
新客户端IP一键过白功能开发与配置 前言部署了一个自己使用的web服务,不想对公网开放。最初用iptables对自己当前的电脑IP开放,禁止其他IP访问。每次路由器重启,或者在外出差,IP经常变动。需要登录服务器,新增新的IP。决定改变控制方式,利用nginx的IP白名单功能,同时用flask写了一个对公网开放的页面。当地址变动时,访问此页面。点击一键更新,就把最新的ip加入到nginx的白名单。同时重新加载nginx配置生效。{card-default label="ip更新页面" width="85%"}{/card-default}被控制服务需要进行ip访问控制,不对公网开放的nginx配置信息。default.conf配置用加载了ip白名单文件whitelist.conf# Appadmin server { listen 80; server_name 0.0.0.0; root /www/web/maccms_v10/; server_tokens off; #include none.conf; index index.php index.html index.htm; access_log /www/web_logs/wp_access.log wwwlogs; error_log /www/web_logs/wp_error.log notice; #auth_basic "请输入用户和密码"; # 验证时的提示信息 #auth_basic_user_file /etc/nginx/password; # 认证文件 location /{ include whitelist.conf; #默认位置路径为/etc/nginx/ 下, #如直接写include whitelist.conf,则只需要在/etc/nginx目录下创建whitelist.conf deny all; } location ~ \.php$ { fastcgi_pass php:9000; fastcgi_index index.php; include fcgi.conf; } #需要注意伪静态的配置 if (!-e $request_filename) { rewrite ^/index.php(.*)$ /index.php?s=$1 last; rewrite ^/api.php(.*)$ /api.php?s=$1 last; rewrite ^/adm0.php(.*)$ /adm0.php?s=$1 last; rewrite ^(.*)$ /index.php?s=$1 last; break; } location ~ .*\.(gif|jpg|jpeg|png|bmp|swf)$ { expires 30d; } location ~ .*\.(js|css)?$ { expires 12h; } }whitelist.conf文件内存放需要开放的IP,文件内容:allow 101.31.158.153;控制服务文章开头的一键放通页面用flask框架实现, 单独部署app.py主要实现逻辑,有两个接口。一个接口提供页面,一个接口负责获取IP后更新,同时重新加载被控制服务的nginx配置隐藏内容,请前往内页查看详情index.html提供文章开头的一键更新功能的页面代码<!DOCTYPE html> <html lang="en"> <head> <meta charset="UTF-8"> <meta name="viewport" content="width=device-width, initial-scale=1.0"> <title>IP 过白</title> <link rel="stylesheet" href="styles.css"> <!-- Link to external CSS file --> <script src="https://code.jquery.com/jquery-3.6.0.min.js"></script> <style> body { font-family: Arial, sans-serif; display: flex; justify-content: center; align-items: center; height: 100vh; background-color: #f0f0f0; margin: 0; } .container { text-align: center; background-color: #fff; padding: 20px; border-radius: 8px; box-shadow: 0 0 10px rgba(0, 0, 0, 0.1); } h1 { color: #333; } #uploadBtn { background-color: #007bff; color: #fff; border: none; padding: 10px 20px; border-radius: 5px; cursor: pointer; font-size: 16px; transition: background-color 0.3s ease; } #uploadBtn:hover { background-color: #0056b3; } #uploadBtn:focus { outline: none; } </style> </head> <body> <div class="container"> <h1>更新此客户端IP</h1> <button id="uploadBtn">确认</button> </div> <script> $(document).ready(function() { $('#uploadBtn').click(function() { $.ajax({ type: 'POST', url: '/upload_ip', success: function(response) { if (response.status === 'success') { alert('IP 更新成功: ' + response.ip); ('Error: ' + response.message); } }, error: function() { alert('发生错误.'); } }); }); }); </script> </body> </html>服务启动控制服务通过systemd加载,配置文件为:/etc/systemd/system/ipallow.service。配置内容为[Unit] Description=IpAllow App [Service] User=root WorkingDirectory=/opt/ipallow ExecStart=/usr/local/bin/gunicorn -w 2 -b 0.0.0.0:801 app:app Restart=always [Install] WantedBy=multi-user.targetcaddy代理控制服务启动了服务器的801端口,通道caddy2代理到443,然后通过公网可访问。不用nginx代理的原因是控制服务会重启nginx,导致前端页面在等待返回结构时异常。b.test.xyz:443 { tls service@test.xyz encode gzip log { output file /logs/access.log } header / { Strict-Transport-Security "max-age=31536000;includeSubdomains;preload" } #访问认证 basicauth / { cms $2a$14$bNLxxxxxxxxxxxxxxxxxxxxxxGAbzyOUyoBn1rjfpN/O } ## HTTP 代理配置 reverse_proxy http://192.168.0.203:801 { header_up X-Real-IP {http.request.remote.host} header_up X-Forwarded-For {http.request.remote.host} header_up X-Forwarded-Port {http.request.port} header_up X-Forwarded-Proto {http.request.scheme} } }caddy认证密码生产caddy的认证密码caddy hash-password --plaintext 'cmsxxxx'
-
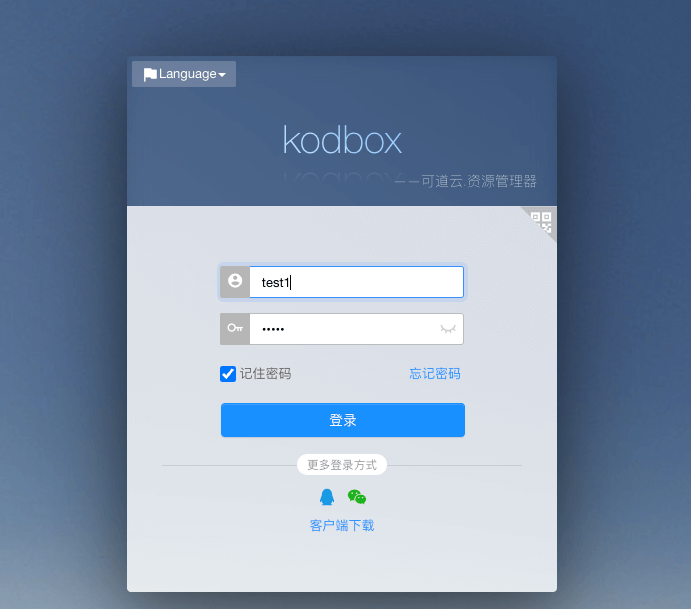
可道云企业私有云盘kodbox部署过程 前言可道云盘用于企业文档管理,免费版支持10个人,有精细化的权限控制体系。小微企业够用了。本文采用docker方式启动。{card-default label="登录界面" width="80%"}{/card-default}源码下载部署过程采用docker-compose启动,docker镜像先传输到阿里云,然后通过阿里云拉取。docker-compose.yml启动文件隐藏内容,请前往内页查看详情{card-default label="后台" width="85%"}{/card-default}使用目录权限管理权限角色分得很细,基本满足使用{card-default label="权限" width="80%"}{/card-default}新增用户新增一个普通用户,并设置权限{card-default label="新增用户" width="80%"}{/card-default}
-
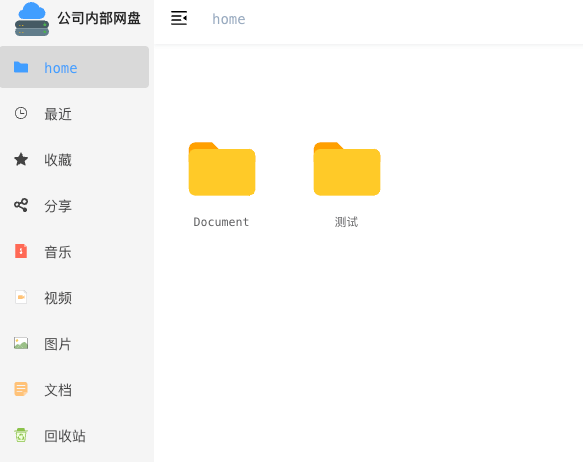
jmalcloud个人网盘搭建部署 前言JmalCloud 是一款私有云存储网盘项目,能够简单安全管理您的云端文件。https://github.com/jamebal/jmal-cloud-view/blob/master/README.md {card-default label="系统界面" width="80%"}{/card-default}系统部署支持多种部署方式,本人采用docker-compose启动启动文件services: mongo: container_name: jmalcloud_mongodb image: registry.cn-beijing.aliyuncs.com/jmalcloud/mongo:4.4 environment: TZ: "Asia/Shanghai" volumes: - ./docker/jmalcloud/mongodb/data/db:/data/db - ./docker/jmalcloud/mongodb/backup:/dump restart: unless-stopped healthcheck: test: ["CMD", "mongo", "--eval", "db.adminCommand('ping')"] interval: 10s timeout: 5s retries: 3 command: --wiredTigerCacheSizeGB 0.5 jmalcloud: container_name: jmalcloud_server image: registry.cn-beijing.aliyuncs.com/jmalcloud/jmalcloud:latest environment: MONGODB_URI: "mongodb://mongo:27017/jmalcloud" TZ: "Asia/Shanghai" JVM_OPTS: "-Xms256m -Xmx1024m" volumes: - ./docker/jmalcloud/files:/jmalcloud/files/ restart: unless-stopped depends_on: mongo: condition: service_healthy nginx: container_name: jmalcloud_nginx image: registry.cn-beijing.aliyuncs.com/jmalcloud/jmalcloud-nginx:latest ports: - 7070:80 - 7071:8089 environment: TZ: "Asia/Shanghai" links: - jmalcloud - office restart: unless-stopped office: # Optional container_name: jmalcloud_office image: registry.cn-beijing.aliyuncs.com/jmalcloud/onlyoffice_documentserver:8.0.1 environment: TZ: "Asia/Shanghai" JWT_SECRET: "my_secret" restart: unless-stopped系统功能支持用户管理、网站管理、网盘设置等{card-default label="功能界面" width="80%"}{/card-default}
-
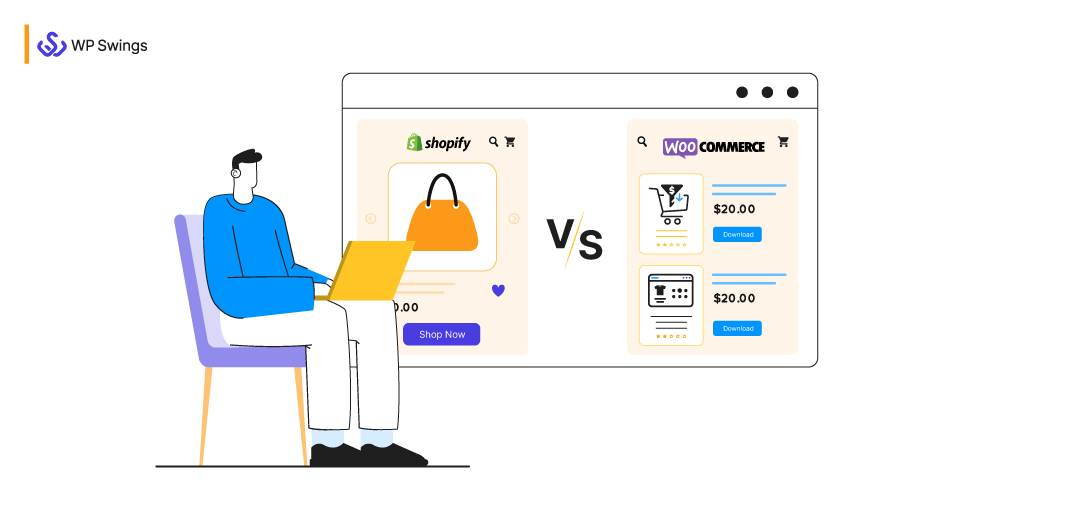
为woocommerce开发支付网关插件,对接支付通道 前言WooCommerce模板众多,可以选择出我们需要的模板,生态好,而且数千个钩子更加利于开发者开发。本文分享如何为woocommerce独立站开发第三方支付插件。创建插件因为WooCommerce有很多的钩子,所以我们在开发支付网关的时候,只需按照一个“框架”来开发就好,下面的是插件框架<?php /* * Plugin Name: WooCommerce自定义支付网关 * Plugin URI: https://www.kekc.cn/ * Description: 这个插件是我们开发自定义支付网关时的示例插件 * Author: kekc * Author URI: https://www.kekc.cn * Version: 1.0.0 */ /* * 这个动作钩子将我们的PHP类注册为WooCommerce的支付网关 */ add_filter( 'woocommerce_payment_gateways', 'kekc_cn_add_gateway_class' ); function kekc_cn_add_gateway_class( $gateways ) { $gateways[] = 'WC_kekc_cn_Gateway'; // 类似一个支付别名 return $gateways; } /* * 注意它是在plugins_loaded动作钩子里面的,也就是插件加载时的hook */ add_action( 'plugins_loaded', 'kekc_cn_init_gateway_class' ); function kekc_cn_init_gateway_class() { class WC_kekc_cn_Gateway extends WC_Payment_Gateway { /** * 从这里开始执行,我们先放在这,之后详细讲 */ public function __construct() { ... } /** * 插件选项,也就是插件的设置页面的设置项,也在之后详细说 */ public function init_form_fields(){ ... } /** * 支付字段,填一些表单数据,字段等,比如用信用卡支付的信用卡号之类的 */ public function payment_fields() { ... } /* * 自定义CSS和JS,在大多数情况下,只有当你决定使用自定义支付字段时才需要。 */ public function payment_scripts() { ... } /* * 字段验证 */ public function validate_fields() { ... } /* * 在这里处理付款 */ public function process_payment( $order_id ) { ... } /* * 如果你需要一个webhook,如PayPal IPN等,可以新建个函数,以便在其他函数中使用它 */ public function webhook() { ... } } }具体代码构造函数public function __construct() { $this->id = 'kekc_cn'; // 支付网关插件ID,可以字符串,但是要唯一 $this->icon = ''; // 将显示在结账页上你的支付网关图标。内容为URL $this->has_fields = true; // 你需要自定义支付网关字段就填true $this->method_title = 'kekc_cn Gateway'; $this->method_description = 'Description of kekc_cn payment gateway'; // 显示在选项页上 // 网关可以支持订阅、退款、保存支付方式。 // 但在本教程中,我们从简单的支付开始 $this->supports = array( 'products' ); // 所有选项字段的方法 $this->init_form_fields(); // 加载设置 $this->init_settings(); $this->title = $this->get_option( 'title' ); $this->description = $this->get_option( 'description' ); $this->enabled = $this->get_option( 'enabled' ); $this->testmode = 'yes' === $this->get_option( 'testmode' ); $this->private_key = $this->testmode ? $this->get_option( 'test_private_key' ) : $this->get_option( 'private_key' ); $this->publishable_key = $this->testmode ? $this->get_option( 'test_publishable_key' ) : $this->get_option( 'publishable_key' ); // 这个动作钩子保存上面的设置 add_action( 'woocommerce_update_options_payment_gateways_' . $this->id, array( $this, 'process_admin_options' ) ); // 我们需要自定义的JavaScript来获得token add_action( 'wp_enqueue_scripts', array( $this, 'payment_scripts' ) ); // 你也可以在这里注册一个webhook // add_action( 'woocommerce_api_{webhook name}', array( $this, 'webhook' ) ); } 添加管理配置字段这个的话都需要把,比如开发易支付支付网关,就需要url,商户ID,商户token等,还需要"启用/禁用","标题","描述"和"测试模式"等设置项。public function init_form_fields(){ $this->form_fields = array( 'enabled' => array( 'title' => 'Enable/Disable', 'label' => 'Enable kekc_cn Gateway', 'type' => 'checkbox', 'description' => '', 'default' => 'no' ), 'title' => array( 'title' => 'Title', 'type' => 'text', 'description' => 'This controls the title which the user sees during checkout.', 'default' => 'Credit Card', 'desc_tip' => true, ), 'description' => array( 'title' => 'Description', 'type' => 'textarea', 'description' => 'This controls the description which the user sees during checkout.', 'default' => 'Pay with your credit card via our super-cool payment gateway.', ), 'testmode' => array( 'title' => 'Test mode', 'label' => 'Enable Test Mode', 'type' => 'checkbox', 'description' => 'Place the payment gateway in test mode using test API keys.', 'default' => 'yes', 'desc_tip' => true, ), 'test_publishable_key' => array( 'title' => 'Test Publishable Key', 'type' => 'text' ), 'test_private_key' => array( 'title' => 'Test Private Key', 'type' => 'password', ), 'publishable_key' => array( 'title' => 'Live Publishable Key', 'type' => 'text' ), 'private_key' => array( 'title' => 'Live Private Key', 'type' => 'password' ) ); }验证信息为什么要验证信息呢?我们有的支付网关,可以先验证用户信息,比如你银行卡支付需要接收短信验证码之类的,来确认是用户本人操作,那就需要此步骤,反之,如微信支付、支付宝支付、易支付、PayPal等等,支付都在第三方处理,不在我们服务器,所以无需验证,你可以直接空着或者是删除这个验证类方法。{card-describe title="比如信用卡"}客户填写其卡数据并单击“购买”按钮。我们使用WooCommerce中的事件延迟表单提交,并将带有卡数据的AJAX请求直接发送到我们的支付处理器,checkout_place_order如果客户详细信息正常,处理器将返回一个令牌,我们将其添加到下面的表格中,现在我们可以提交表格(当然在JS中),我们使用PHP中的令牌通过支付处理器的API捕获付款。{/card-describe}PHP代码部分public function payment_scripts() { // 我们只需要在购物车/结账页面用JavaScript来处理一个token,看它是否正确? if ( ! is_cart() && ! is_checkout() && ! isset( $_GET['pay_for_order'] ) ) { return; } // 如果我们的支付网关被禁用,我们就不需要js了 if ( 'no' === $this->enabled ) { return; } // 如果没有设置API密钥,就不需要js if ( empty( $this->private_key ) || empty( $this->publishable_key ) ) { return; } // 除非你的网站处于测试模式,否则不要在没有SSL的情况下验证。 if ( ! $this->testmode && ! is_ssl() ) { return; } // 让我们假设这是我们的支付处理器的JavaScript,它能得到一个token wp_enqueue_script( 'kekc_cn_js', 'https://www.kekc_cnpayments.com/api/token.js' ); // 这是在插件目录中的自定义JS,与token.js一起处理。 wp_register_script( 'woocommerce_kekc_cn', plugins_url( 'kekc_cn.js', __FILE__ ), array( 'jquery', 'kekc_cn_js' ) ); // 在大多数支付处理程序中,必须使用公共密钥来获得一个token wp_localize_script( 'woocommerce_kekc_cn', 'kekc_cn_params', array( 'publishableKey' => $this->publishable_key ) ); wp_enqueue_script( 'woocommerce_kekc_cn' ); }JS代码部分var successCallback = function(data) { var checkout_form = $( 'form.woocommerce-checkout' ); // 添加一个隐藏的token提交框 // console.log(data)查看token checkout_form.find('#kekc_cn_token').val(data.token); // 禁止token Request checkout_form.off( 'checkout_place_order', tokenRequest ); // 现在提交form表单 checkout_form.submit(); }; var errorCallback = function(data) { console.log(data); }; var tokenRequest = function() { // 这里将是一个支付网关函数,处理来自你的表单的所有卡片数据,也许它需要你的可发布API密钥,即kekc_cn_params.publishableKey, // 并在成功时触发successCallback(),失败时触发errorCallback。 return false; }; jQuery(function($){ var checkout_form = $( 'form.woocommerce-checkout' ); checkout_form.on( 'checkout_place_order', tokenRequest ); });添加支付字段表单public function payment_fields() { // 在支付表单前添加一些信息 if ( $this->description ) { // 你可以说明测试模式,显示测试之类的。 if ( $this->testmode ) { $this->description .= ' TEST MODE ENABLED. In test mode, you can use the card numbers listed in <a href="#">documentation</a>.'; $this->description = trim( $this->description ); } // 显示带有<p>标签的描述等。 echo wpautop( wp_kses_post( $this->description ) ); } // 我将用echo()的形式,你也可以直接在HTML中写 echo '<fieldset id="wc-' . esc_attr( $this->id ) . '-cc-form" class="wc-credit-card-form wc-payment-form" style="background:transparent;">'; // 如果你想让你的自定义支付网关支持这个动作,请添加这个动作钩子 do_action( 'woocommerce_credit_card_form_start', $this->id ); // #ccNo, #expdate, #cvc自己改成自己的 echo '<div class="form-row form-row-wide"><label>Card Number <span class="required">*</span></label> <input id="kekc_cn_ccNo" type="text" autocomplete="off"> </div> <div class="form-row form-row-first"> <label>Expiry Date <span class="required">*</span></label> <input id="kekc_cn_expdate" type="text" autocomplete="off" placeholder="MM / YY"> </div> <div class="form-row form-row-last"> <label>Card Code (CVC) <span class="required">*</span></label> <input id="kekc_cn_cvv" type="password" autocomplete="off" placeholder="CVC"> </div> <div class="clear"></div>'; do_action( 'woocommerce_credit_card_form_end', $this->id ); echo '<div class="clear"></div></fieldset>'; }{card-default label="效果" width="80%"}{/card-default}处理付款验证字段像名字这样的结帐字段应该更早验证,下面是一个例子。public function validate_fields(){ if( empty( $_POST[ 'billing_first_name' ]) ) { wc_add_notice( 'First name is required!', 'error' ); return false; } return true; }变更订单状态使用API获取付款并设置订单状态public function process_payment( $order_id ) { global $woocommerce; // 根据订单id获取订单明细 $order = wc_get_order( $order_id ); /* * 带有参数的数组,用于API交互 */ $args = array( ... ); /* * API交互可以用wp_remote_post()来构建 */ $response = wp_remote_post( '{payment processor endpoint}', $args ); if( !is_wp_error( $response ) ) { $body = json_decode( $response['body'], true ); // 它可能是不同的,这取决于你的支付处理程序 if ( $body['response']['responseCode'] == 'APPROVED' ) { // 我们收到付款 $order->payment_complete(); $order->reduce_order_stock(); // 给客户备注。 $order->add_order_note( '您的订单已经支付了! 谢谢你!', true ); // 空购物车 $woocommerce->cart->empty_cart(); // 重定向到感谢页面 return array( 'result' => 'success', 'redirect' => $this->get_return_url( $order ) ); } else { wc_add_notice( '请重试!', 'error' ); return; } } else { wc_add_notice( '连接失败。', 'error' ); return; } }
-
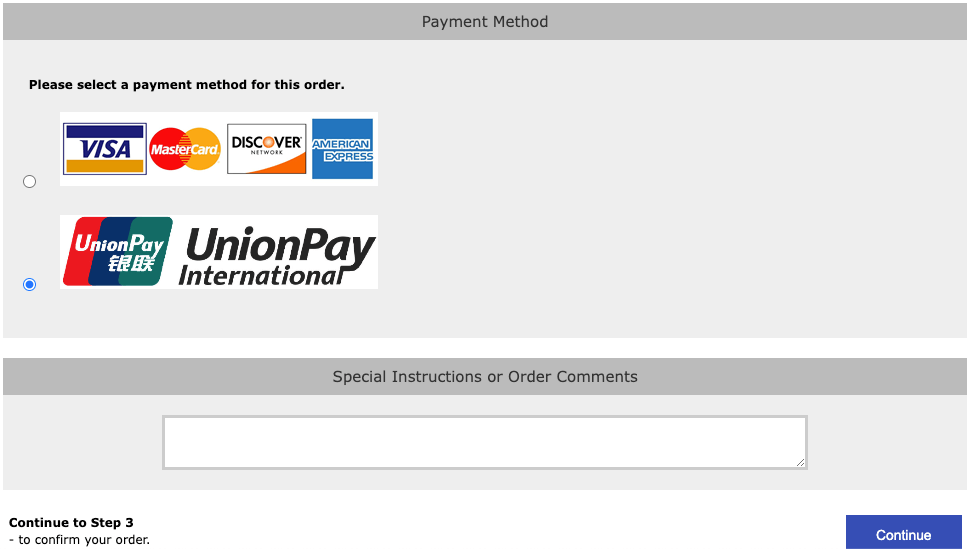
zencart商城对接日本支付通道 前言当前用zencart商城的比较少了,最近又接到一个新的需求。为zencart商城对接一个日本的本地支付通道。原先为zencart商城开发过一个支付插件,拿来改造一下,记录改造过程。{card-default label="支付方式" width="80%"}{/card-default}核心代码支付方式选择后,组织参数,提交到上游api,均通过unionpaySubmitOrder.php 文件完成。订单提交//提交参数 $parmsa = array( "ShopID" => $data['MerNo'], "ShopPass" => $data['Md5Key'], "OrderID" => $data['BillNo'], "JobCd" => 'CAPTURE', "Amount" => $data['Amount'], "Tax" => '0' ); $req_api_a = "https://p01.mul-pay.jp/payment/EntryTranUnionpay.idPass"; //获取支付链接 $resa = curlRemote($req_api_a, $parmsa); //将返回转换为数组 $resa_data = stringToArray($resa); //构造函数 $parmsb = array( "ShopID" => $data['MerNo'], "ShopPass" => $data['Md5Key'], "OrderID" => $data['BillNo'], "AccessID" => $resa_data['AccessID'], "AccessPass" => $resa_data['AccessPass'], "RetURL" => $data['ReturnURL'], "ErrorRcvURL" => $data['ReturnURL'], ); $req_api_b = 'https://p01.mul-pay.jp/payment/ExecTranUnionpay.idPass'; //获取支付链接 $resb = curlRemote($req_api_b, $parmsb); //将返回转换为数组 $resb_data = stringToArray($resb);自动跳转,模版渲染获取resb_data数据内,含有支付所需的token和一次性使用密钥。通过js提交到响应接口。此功能通过php模版渲染功能完成。<?php if(!defined('VERSION_INFO')){ exit; } ?> <html> <head> <title><?php echo varGet($data, 'L_SUBMIT_ORDER_CONFIRM_TITLE'); ?></title> <meta http-equiv="Content-Type" content="text/html; charset=Windows-31J"> </head> <body OnLoad='OnLoadEvent();'> <form name="UnionpayStartCall" action="<?php echo varGet($resb_data, 'StartURL'); ?>" method="POST"> <noscript> hello; <br> <br> <center> <h2>ネット銀聯の決済画面へ遷移します。</h2> <input type="submit" value="続行"> </center> </noscript> <input type="hidden" name="AccessID" value="<?php echo varGet($resb_data, 'AccessID'); ?>"> <input type="hidden" name="Token" value="<?php echo varGet($resb_data, 'Token'); ?>"> </form> <script> <!-- function OnLoadEvent() { document.UnionpayStartCall.submit(); } //--> </script> </body> </html>插件设置插件设置界面{card-default label="插件设置" width="80%"}{/card-default}
-
-
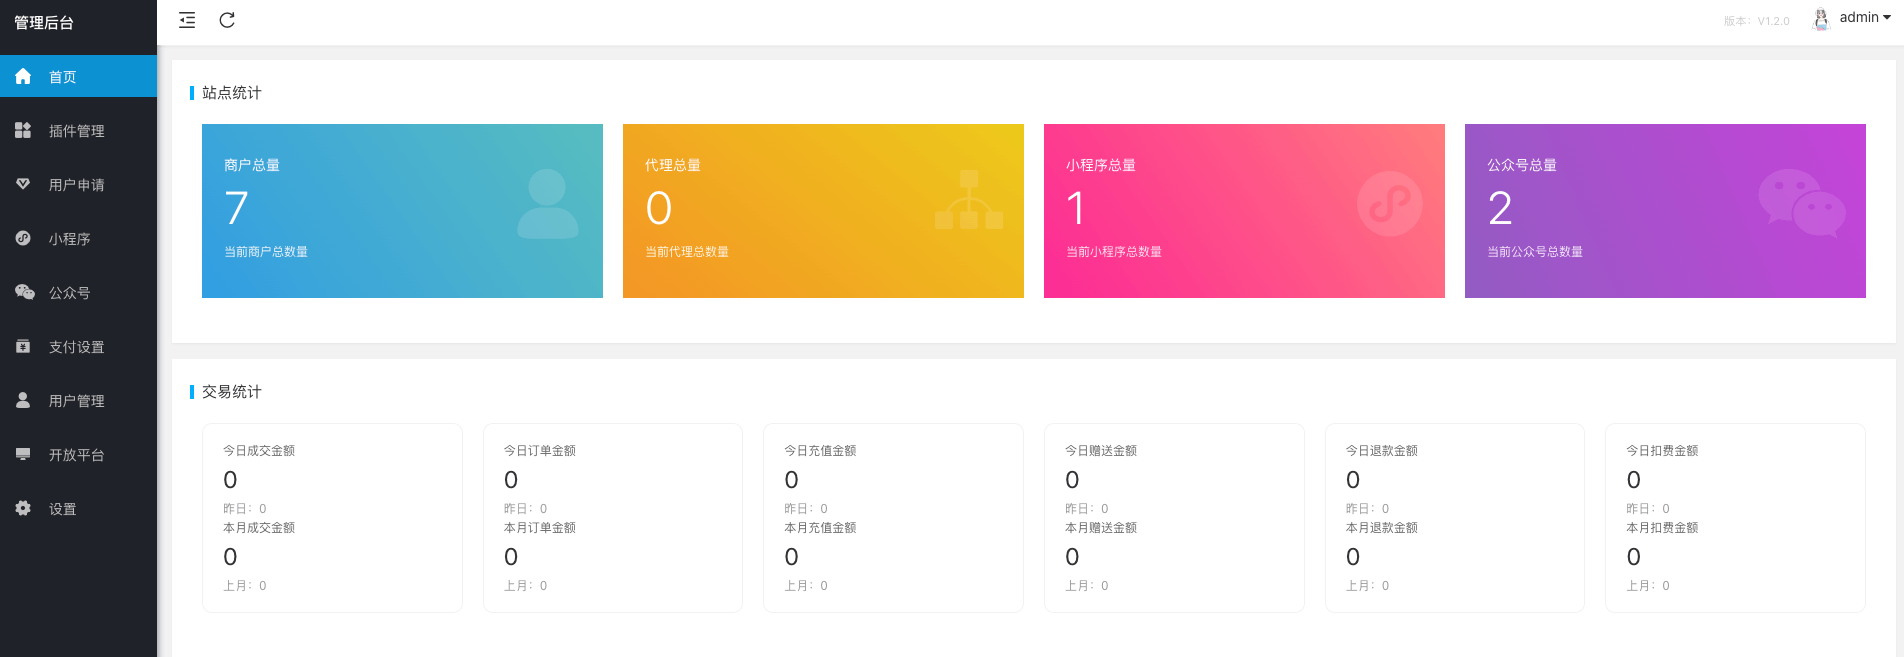
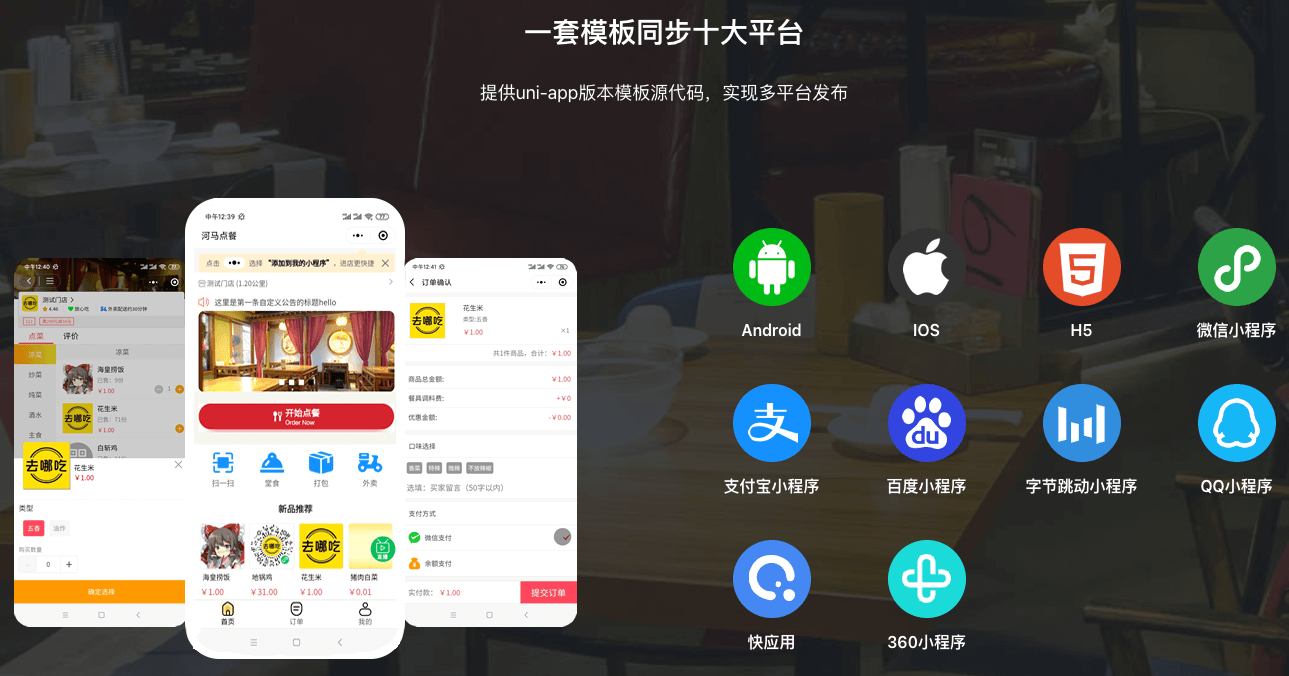
餐厅扫码点餐平台搭建部署过程 前言扫码点餐越来越流行,最近接了一个新的项目。为某餐厅上一套扫码点餐系统。记录整个部署过程。{card-default label="系统介绍" width="80%"}{/card-default}{card-describe title="源码介绍"}本框架是基于ThinkPHP的多应用模式所开发的,采用MVC的设计模式,每个模块分为三层(模型M、视图V、控制器C)。默认应用模块:common、admin、agent、user、index、applet、api、store{/card-describe}环境要求,均采用docker方式启动:PHP版本 >= 7.4 (推荐PHP7.4版本)MySql版本 >= 5.6 (需支持innodb引擎)Apache版本 >= 2.4以上 或 Nginx >= 1.10(推荐使用宝塔等集成环境)其它:服务器支持https,必须安装SSL证书,否则会影响接口的通信。部署过程详细部署过程,有专门的文档。 hemaPHP ,本文只记录部署过程中遇到的问题。构建php的docker镜像docker的官网被封了,需要搭建自己的私有源镜像。docker login --username=xwzy1130 registry.cn-hangzhou.aliyuncs.com #推送 docker tag 8933d3e7e14b registry.cn-hangzhou.aliyuncs.com/mybud/php74:lastest docker push registry.cn-hangzhou.aliyuncs.com/mybud/php74:lastest # 引用 docker pull registry.cn-hangzhou.aliyuncs.com/mybud/php74:lastestnginx配置nginx/services/nginx/conf/conf.d/hema_saas.confserver { listen 802; server_name 0.0.0.0; root /www/web/hema_saas/public; index index.html index.htm index.php; charset utf-8; access_log /www/web_logs/dcb.log wwwlogs; error_log /www/web_logs/dcb.err notice; server_tokens off; client_max_body_size 50m; error_page 500 502 503 504 /50x.html; location = /50x.html { root /usr/share/nginx/html; } location / { if (!-e $request_filename) { rewrite ^(.*)$ /index.php?s=/$1 last; break; } } location ~ \.php$ { fastcgi_pass 10.0.16.8:9000; fastcgi_index index.php; include fcgi.conf; fastcgi_buffers 8 4K; fastcgi_buffer_size 4K; } location ~ .*\.(gif|jpg|jpeg|png|bmp|swf)$ { expires 30d; } location ~ .*\.(js|css)?$ { expires 12h; } }
-
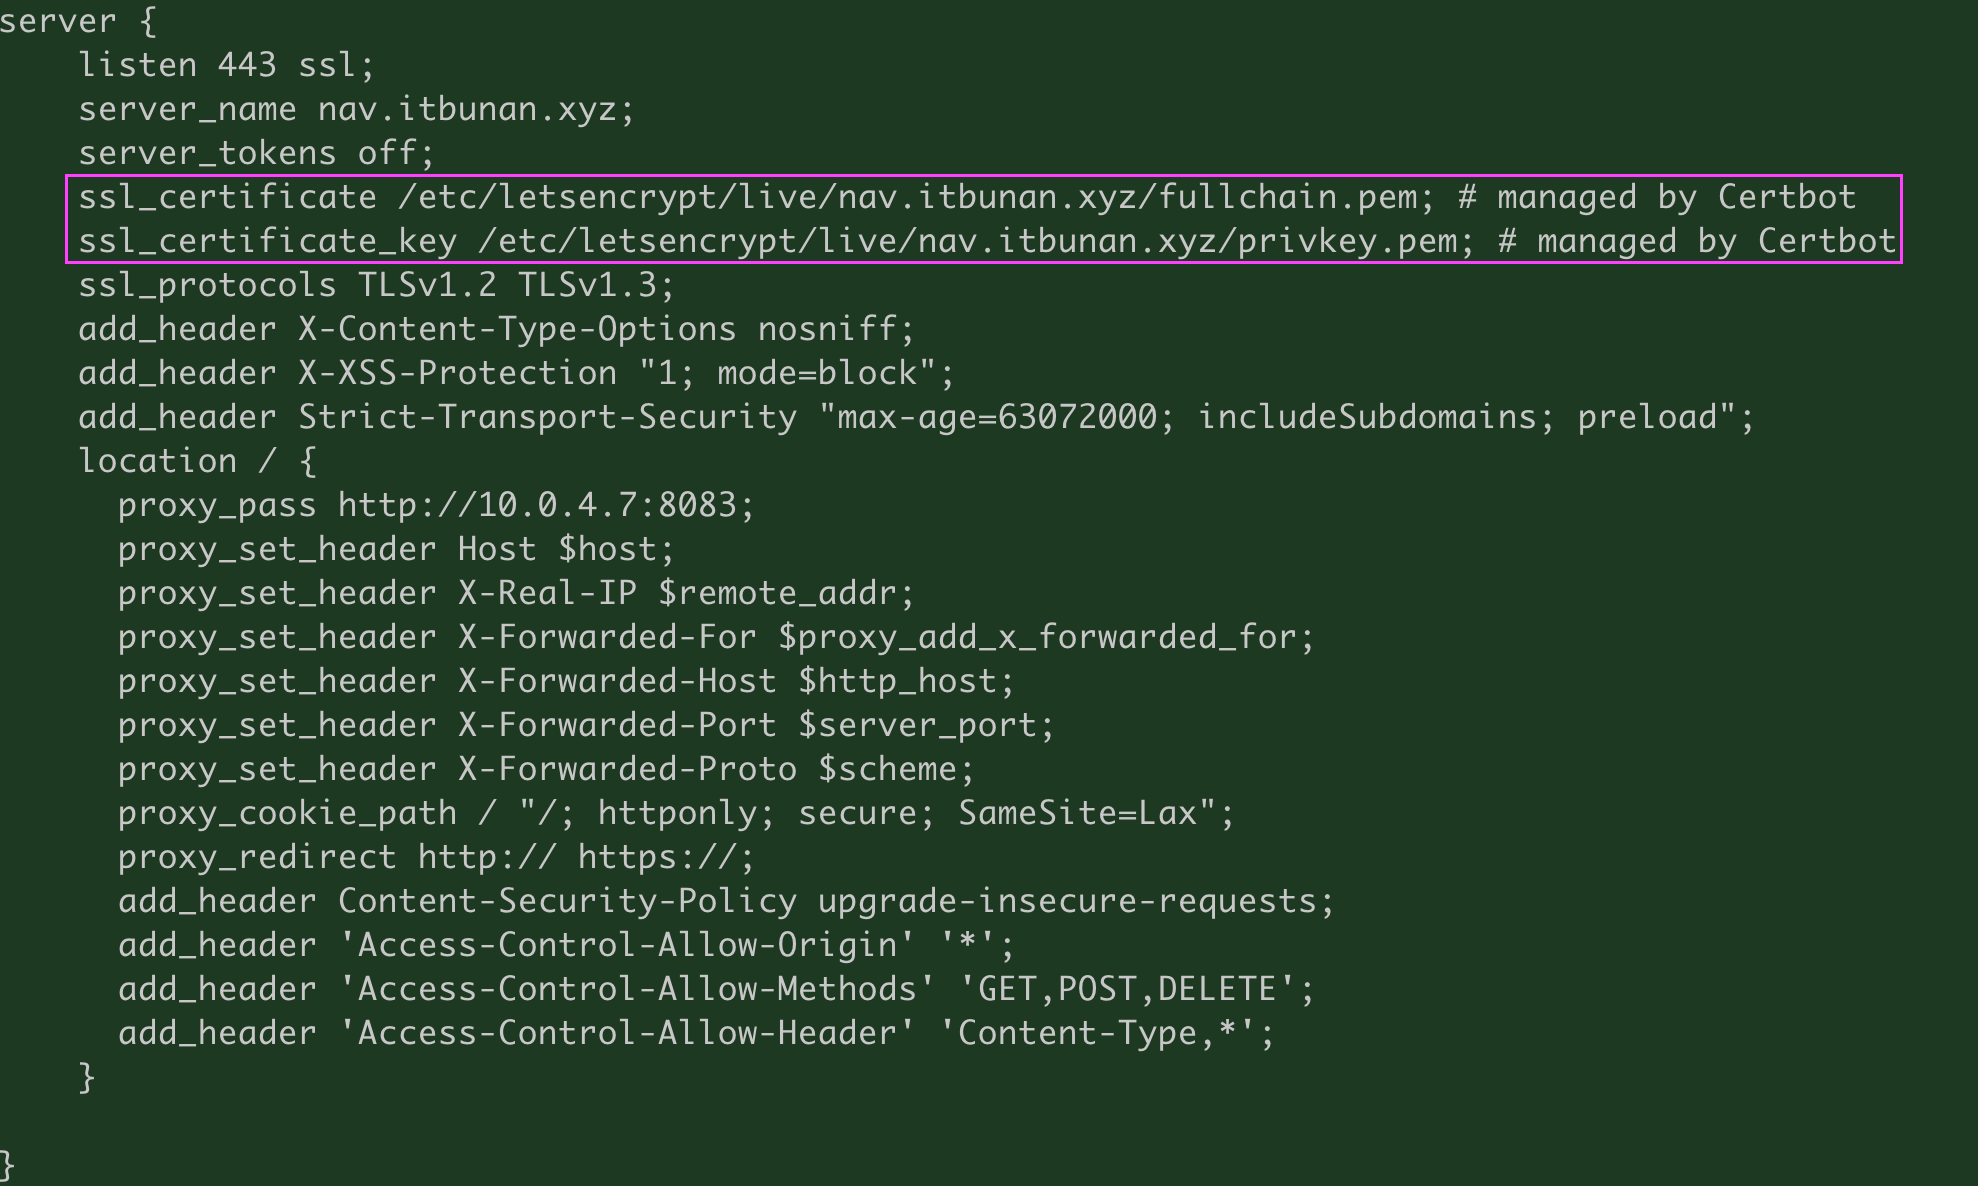
nginx自动申请ssl证书 前沿腾讯云或者阿里云后台申请的ssl证书,有一定的时间限制。到期后,还得手动部署,免费的无法自动续签。近期博主自己的网站又有一批证书快过期了。打算一次行解决这个问题。软件安装yum install certbot yum install python-certbot-nginx申请证书以nav.itbunan.xyz 举例certbot --nginx -d nav.itbunan.xyz验证配置是否生效打开/etc/nginx/conf.d/proxy.conf 查看相关配置{card-default label="证书配置" width="75%"}{/card-default}自动续期通过计划任务,自动检查证书期限,并实现自动续期0 12 * * * /usr/bin/certbot renew --quiet